
Posts
acknowledgement
Born, raised, educated, trained and work on lands of the Neutral, Anishinaabeg, Haudenosaunee, Mississaugas, and Secwépemc. Benefits and achievements from time spent on treaty lands including Haldimand Tract of the Six Nations, the Dish with One Spoon Covenant, and unceded lands of Tk’emlúps.
juliatimings
This documents the timings of a simple newton method in R, C (technically cpp but it’s all just C code), and julia.
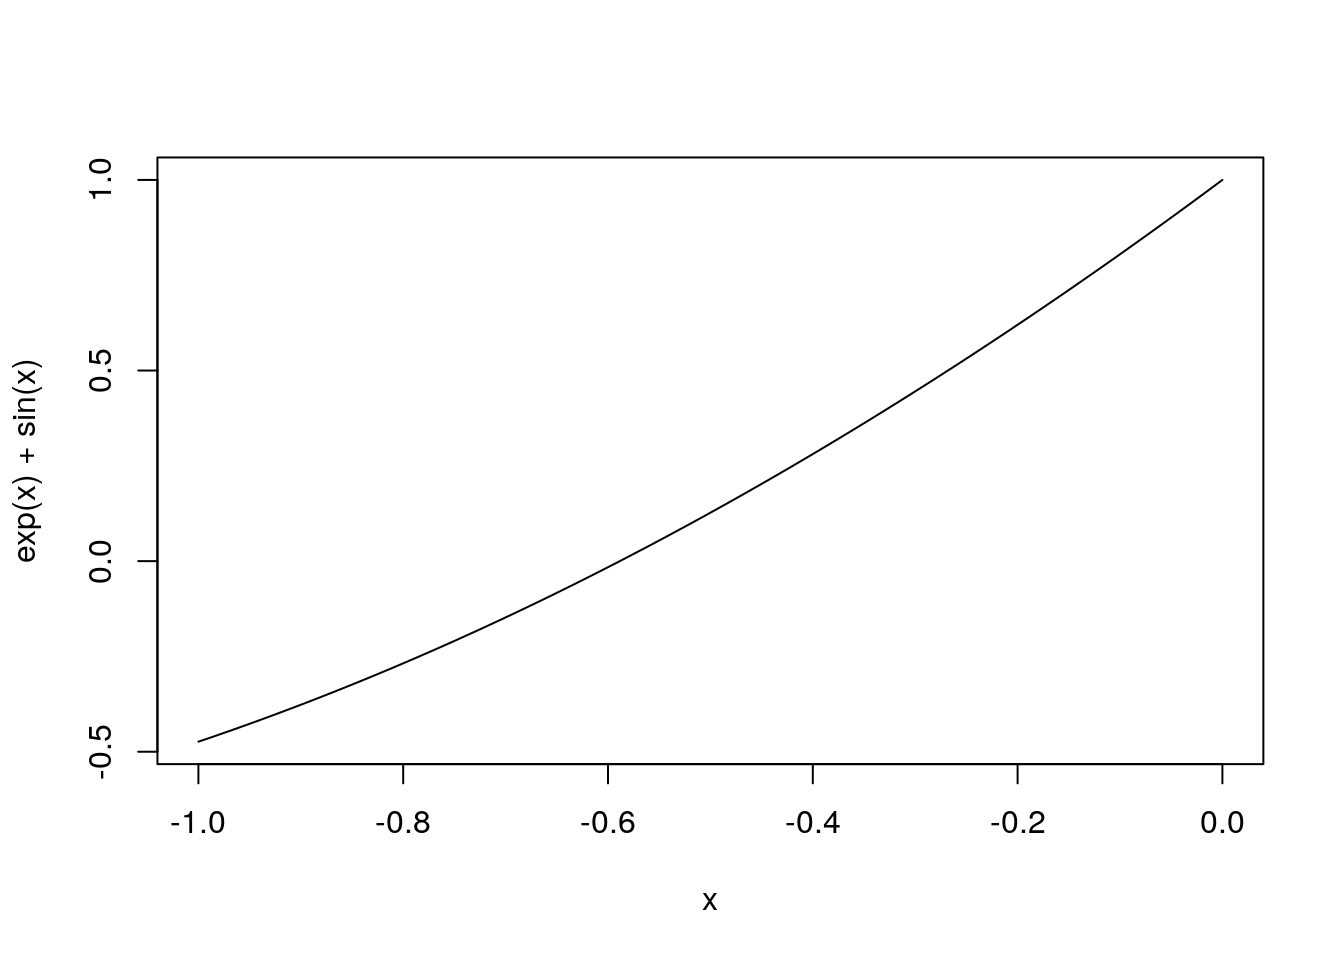
The function is \(f_0(x)=e^x+\sin(x)\) so the newton update would be
$$x\leftarrow x-\frac{f_0(x)}{f_1(x)}=x-\frac{e^x+sin(x)}{e^x+cos(x)}$$
applied repeatedly. A graph of the curve is shown below. It’s already fairly linear so the function will hit the root very quickly but that’s ok.
curve(exp(x)+sin(x),-1,0)
 We'll run the code a fixed number of iterations. I don't know if hitting 0 in the numerator does any short-cutting in any language but thats ok for now.
f0(x)=exp(x)+sin(x)
## f0 (generic function with 1 method)
f1(x)=exp(x)+cos(x)
## f1 (generic function with 1 method)
update(x)=x-f0(x)/f1(x)
## update (generic function with 1 method)
function getroot_julia()
  x=0.0
    for i in 1:50000
        x=update(x)
    end
    return x
end
## getroot_julia (generic function with 1 method)
using BenchmarkTools
timing_julia = @benchmark getroot_julia() samples=5 evals=5
## BenchmarkTools.Trial:
##   memory estimate:  0 bytes
##   allocs estimate:  0
##   --------------
##   minimum time:     1.020 ms (0.00% GC)
##   median time:      1.028 ms (0.00% GC)
##   mean time:        1.030 ms (0.00% GC)
##   maximum time:     1.044 ms (0.00% GC)
##   --------------
##   samples:          5
##   evals/sample:     5
print(timing_julia)
## Trial(1.020 ms)
getroot_r=function(){
  x=0.0
  ee=0
  for (i in 1:50000){
    ee=exp(x)
    x=x-(ee+sin(x))/(ee+cos(x))
  }
  return (x);
}
the c code
#include <Rcpp.h>
using namespace Rcpp;

//[[Rcpp::export]]
double getroot_cpp() {
  double x=0.0;
  double ee=0.0;
  for(int i=0;i<50000;i++){
    ee=exp(x);
    x=x-(ee+sin(x))/(ee+cos(x));
  }
  return (x);
}
library(JuliaCall)
julia_command("f0(x)=exp(x)+sin(x)")
## Julia version 1.6.0 at location /opt/julia-1.6.0/bin will be used.
## Loading setup script for JuliaCall...
## Finish loading setup script for JuliaCall.
## f0 (generic function with 1 method)
julia_command("f1(x)=exp(x)+cos(x)")
## f1 (generic function with 1 method)
julia_command("update(x)=x-f0(x)/f1(x)")
## update (generic function with 1 method)
julia_command("function getroot_julia()
    x=0.0
    for i in 1:50000
        x=update(x)
    end
    return x
end")
## getroot_julia (generic function with 1 method)
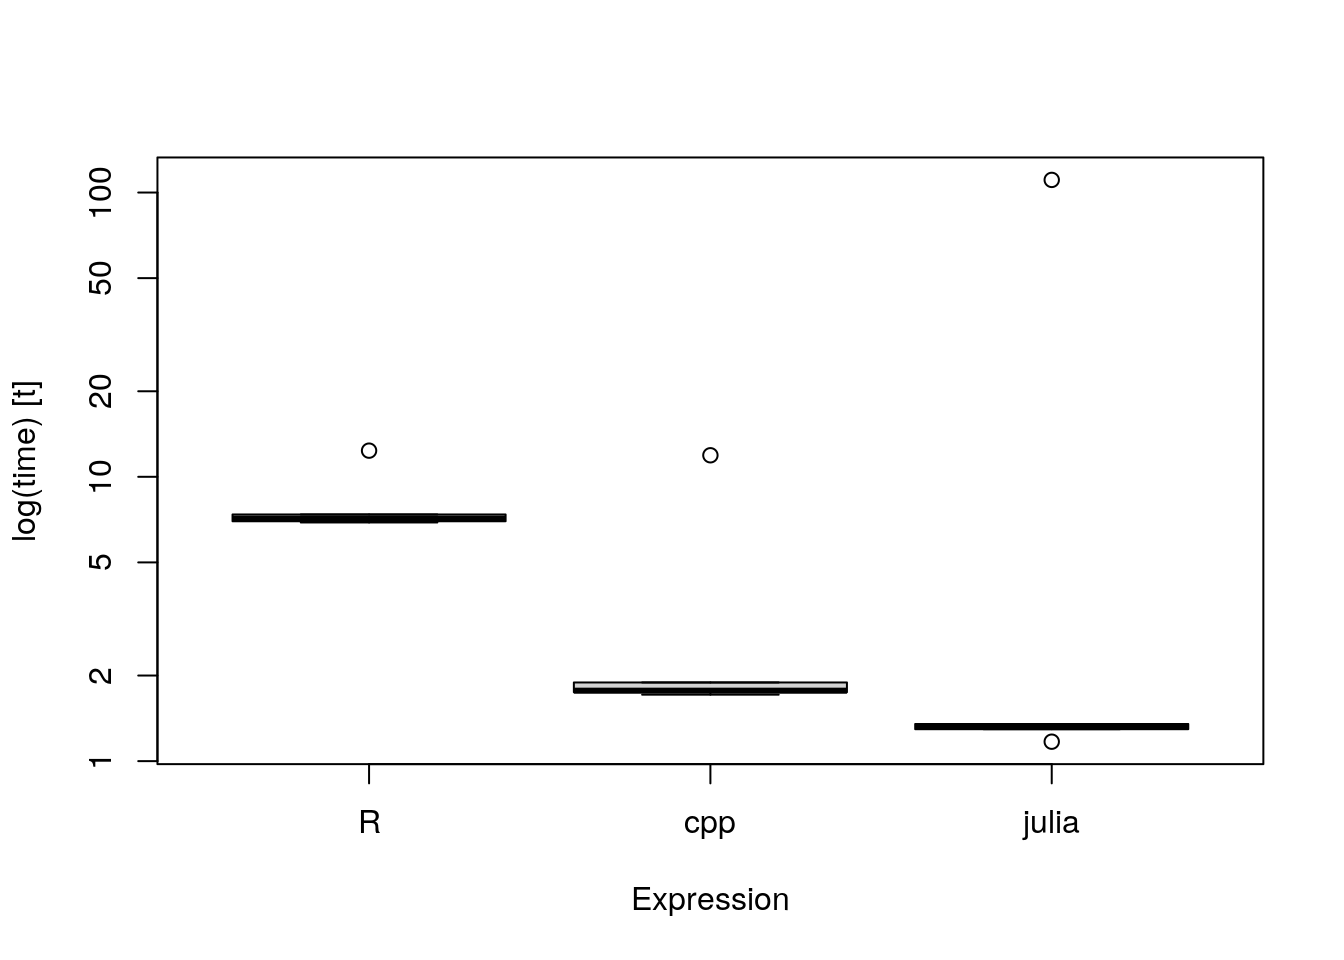
Results
Now that all the functions are created and available, they’re assessed in R. Each runs the same number of iterations with the same initial guess. Each language’s implementation is run a few times times.
library(microbenchmark)
results = microbenchmark(getroot_r(),getroot_cpp(),julia_eval("getroot_julia()"),times=5)
languages = c("R","cpp","julia")
boxplot(results,names=languages)
print(results)
## Unit: milliseconds
##                           expr      min       lq      mean   median       uq
##                    getroot_r() 6.909239 6.978445  8.151796 7.135719 7.372746
##                  getroot_cpp() 1.712824 1.747627  3.805588 1.769192 1.890966
##  julia_eval("getroot_julia()") 1.170483 1.295313 23.182798 1.325362 1.350895
##        max neval
##   12.36283     5
##   11.90733     5
##  110.77194     5
medians = summary(results)[,"median"]
names(medians)=languages

#speeds relative to r
medians/max(medians)
##         R       cpp     julia
## 1.0000000 0.2479347 0.1857363
#speeds relative to julia
medians/min(medians)
##        R      cpp    julia
## 5.383977 1.334875 1.000000
Hello R Markdown
R Markdown
This is an R Markdown document. Markdown is a simple formatting syntax for authoring HTML, PDF, and MS Word documents. For more details on using R Markdown see http://rmarkdown.rstudio.com.
You can embed an R code chunk like this:
summary(cars)
##      speed           dist
##  Min.   : 4.0   Min.   :  2.00
##  1st Qu.:12.0   1st Qu.: 26.00
##  Median :15.0   Median : 36.00
##  Mean   :15.4   Mean   : 42.98
##  3rd Qu.:19.0   3rd Qu.: 56.00
##  Max.   :25.0   Max.   :120.00
fit <- lm(dist ~ speed, data = cars)
fit
##
## Call:
## lm(formula = dist ~ speed, data = cars)
##
## Coefficients:
## (Intercept)        speed
##     -17.579        3.932
Including Plots
You can also embed plots. See Figure 1 for example:
par(mar = c(0, 1, 0, 1))
pie(
  c(280, 60, 20),
  c('Sky', 'Sunny side of pyramid', 'Shady side of pyramid'),
  col = c('#0292D8', '#F7EA39', '#C4B632'),
  init.angle = -50, border = NA
)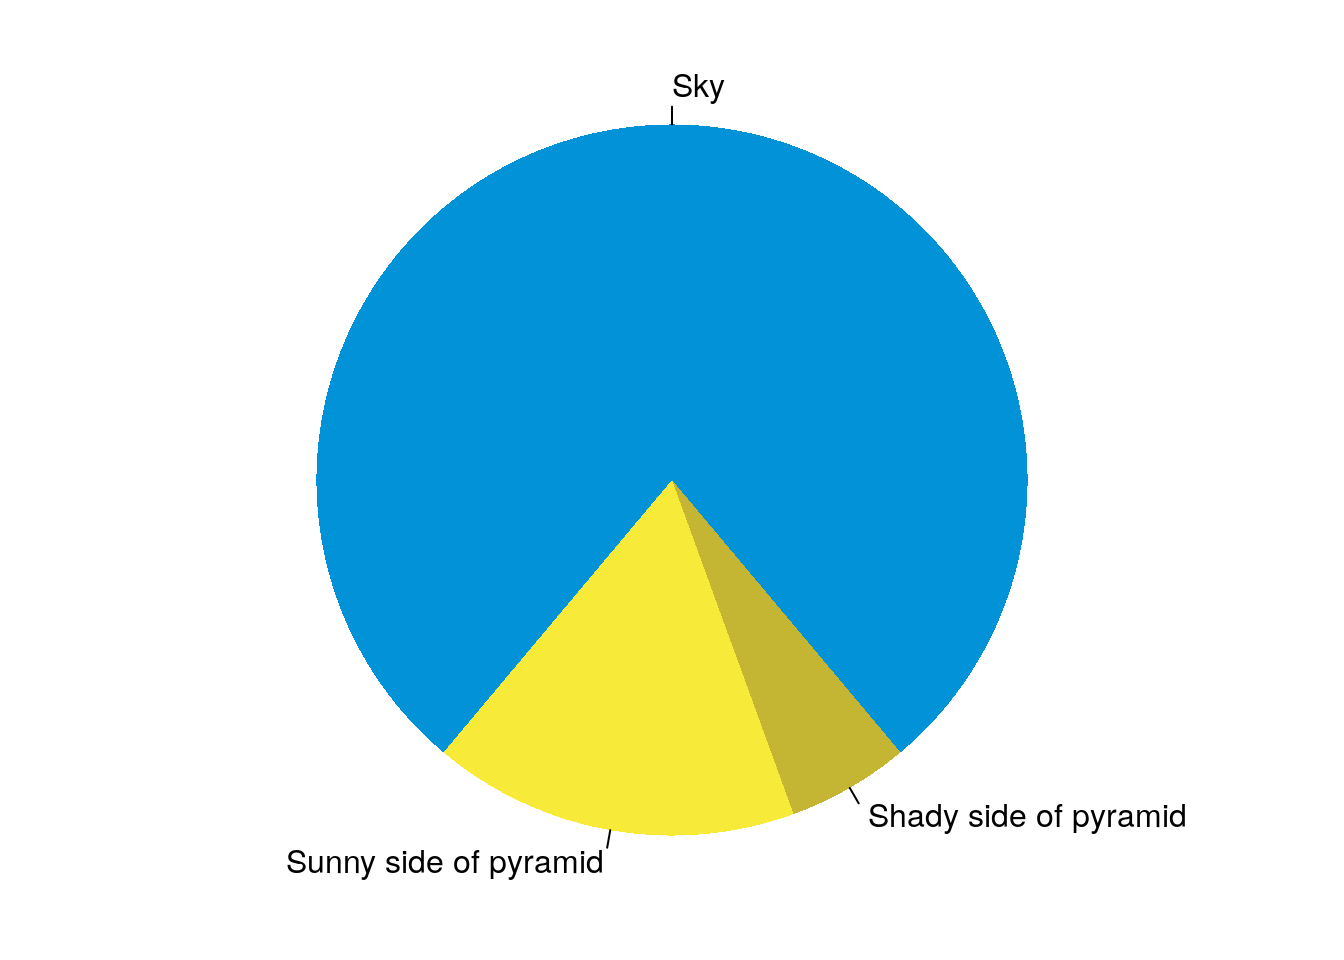
Figure 1: A fancy pie chart.
Theme Changes
Mathjax
Mathjax
The relearn theme doesn’t natively support mathjax. One fix that works is to add the script to a file in /layouts/partials/. I added it to /layouts/partials/menu-footer.html.
<script src="//yihui.org/js/math-code.js"></script>
<script async
src="https://cdn.mathjax.org/mathjax/latest/MathJax.js?config=TeX-AMS-MML_HTMLorMML">
</script>
Remove old menus
Moving original content
inside of /content/ a new folder is created called themeinfo. Inside of that, a copy of basics, cont, more, and shortcodes is made as well as a new _index.en.md.
The file /content/_index.en.md needs to be modified so it refers to all the shortcodes now in themeinfo. Do a search replace of
%relref "
to
%relref "themeinfo/
After that, in each of the folders first mentioned, edit the corresponding _index.en.md and add
hidden: true
into the preamble bit. for example
---
chapter: true
title: Basics
weight: 1
hidden: true
---
Remember to do this for all four folders.
require(blogdown)
stop_server();build_site();serve_site()
#if not already running
hugo server
Page Theme
Hugo Relearn Theme
The Relearn theme is a theme for Hugo, a static website generator written in Go. Where Hugo is often used for blogs, this theme is designed with documentation in mind.
Info
The theme is a fork of the great Learn theme with the aim of fixing long outstanding bugs and adepting to latest Hugo features. As far as possible this theme tries to be a drop-in replacement for the Learn theme.
Main features
Tip
See what’s new within the latest update.
- Usable offline, no external dependencies
- Automatic Search
- Print whole chapters or even the complete site
- Multilingual mode for English, Arabic, Simplified Chinese, Traditional Chinesse, Dutch, French, German, Hindi, Indonesian, Japanese, Korean, Portuguese, Russian, Spanish, Turkish, Vietnamese
- Unlimited menu levels
- Automatic next/prev buttons to navigate through menu entries
- Image resizing, shadow…
- Attachments files
- List child pages
- Mermaid diagram (flowchart, sequence, gantt)
- Swagger UI for OpenAPI Specifications
- Customizable look and feel
- Predefined (light, dark) and customizable color variants
- Buttons
- Tip/Note/Info/Warning boxes
- Expand
- Tabs
- File inclusion
Getting support
To get support, feel free to open a new discussion topic or issue in the official repository on GitHub.
Become a contributor
Feel free to update this documentation by just clicking the Edit link displayed on top right of each page. Your changes will be deployed automatically once they were reviewed.
You are most welcome to contribute bugfixes or even new features to the source code by making pull requests to the official repository via GitHub. Please visit the contribution guidelines first.
License
This theme is licensed under the MIT License.
Credits
This theme would not be possible without the work of many others. See the credits for a detailed list.
Hugo Relearn Theme
The Relearn theme is a theme for Hugo, a static website generator written in Go. Where Hugo is often used for blogs, this theme is designed with documentation in mind.
Info
The theme is a fork of the great Learn theme with the aim of fixing long outstanding bugs and adepting to latest Hugo features. As far as possible this theme tries to be a drop-in replacement for the Learn theme.
Chapter 1
Basics
Discover what this Hugo theme is all about and the core-concepts behind it.
What's new
This document shows you what’s new in the latest release. For a detailed list of changes, see the history page.
Breaking: A change that requires action by you after upgrading to assure the site is still functional.
Change: A change in default behavior. This may requires action by you / may or may not be revertable by configuration.
New: Marks new behavior you might find interesting or comes configurable.
3.4.0
-
Breaking: If you had previously overwritten the
custom-footer.htmlpartial to add visual elements below the content of your page, you have to move this content to the new partialcontent-footer.html.custom-footer.htmlwas never meant to contain HTML other than additional styles and JavaScript. -
New: If you prefer expandable/collapsible menu items, you can now set
collapsibleMenu=truein yourconfig.toml. This will add arrows to all menu items that contain sub menus. The menu will expand/collapse without navigation if you click on an arrow. -
New: You can activate print support in your
config.tomlto add the capability to print whole chapters or even the complete site. -
New: Translation for Traditional Chinese.
3.3.0
-
New: Introduction of new CSS variables to set the font. The theme distinguishs between
--MAIN-fontfor all content text and--CODE-fontfor inline or block code. There are additional overrides for all headings. See the theme variant generator of the exampleSite for all available variables. -
New: The new shortcode
swaggeris available to include a UI for REST OpenAPI Specifications. See the documentation for available features. This feature will not work with Internet Explorer 11.
3.2.0
-
Change: In this release the Mermaid JavaScript library will only be loaded on demand if the page contains a Mermaid shortcode or is using Mermaid codefences. This changes the behavior of
disableMermaidconfig option as follows: If a Mermaid shortcode or codefence is found, the option will be ignored and Mermaid will be loaded regardlessly.The option is still useful in case you are using scripting to set up your graph. In this case no shortcode or codefence is involved and the library is not loaded by default. In this case you can set
disableMermaid=falsein your frontmatter to force the library to be loaded. See the theme variant generator of the exampleSite for an example.This change requires at least Hugo 0.93.0 to be used. The minimum requirement will be reported during build on the console if not met.
-
New: Additional color variant variable
--MERMAID-themeto set the variant’s Mermaid theme. This causes the Mermaid theme to switch with the color variant if it defers from the setting of the formerly selected color variant.
3.1.0
- New:
attachmentandnoticeshortcodes have a new parameter to override the default icon. Allowed values are all Font Awesome 5 Free icons.
3.0.0
-
Breaking: We made changes to the menu footer. If you have your
menu-footer.htmlpartial overridden, you may have to review the styling (eg. margins/paddings) in your partial. For a reference take a look into themenu-footer.htmlpartial that is coming with the exampleSite.This change was made to allow your own menu footer to be placed right after the so called prefooter that comes with the theme (containing the language switch and Clear history functionality).
-
Breaking: We have changed the default colors from the original Learn theme (the purple menu header) to the Relearn defaults (the light green menu header) as used in the official documentation.
This change will only affect your installation if you’ve not set the
themeVariantparameter in yourconfig.toml. If you still want to use the Learn color variant, you have to explicitly setthemeVariant="learn"in yourconfig.toml.Note, that this will also affect your site if viewed with Internet Explorer 11 but in this case it can not be reconfigured as Internet Explorer does not support CSS variables.
-
Change: Due to a bug, that we couldn’t fix in a general manner for color variants, we decided to removed
--MENU-SEARCH-BOX-ICONS-colorand introduced--MENU-SEARCH-colorinstead. You don’t need to change anything in your custom color stylesheet as the old name will be used as a fallback. -
Change: For consistency reasons, we renamed
--MENU-SEARCH-BOX-colorto--MENU-SEARCH-BORDER-color. You don’t need to change anything in your custom color stylesheet as the old name will be used as a fallback. -
New: With this release you are now capable to define your own dark mode variants.
To make this possible, we have introduced a lot more color variables you can use in your color variants. Your old variants will still work and don’t need to be changed as apropriate fallback values are used by the theme. Nevertheless, the new colors allow for much more customization.
To see what’s now possible, see the new variants
relearn-darkandneonthat are coming with this release. -
New: To make the creation of new variants easier for you, we’ve added a new interactive theme variant generator. This feature will not work with Internet Explorer 11.
-
New: You can now configure multiple color variants in your
config.toml. In this case, the first variant is the default chosen on first view and a variant switch will be shown in the menu footer. See the documentation for configuration.Note, that the new variant switch will not work with Internet Explorer 11 as it does not support CSS variables. Therefore, the variant switcher will not be displayed with Internet Explorer 11.
2.9.0
-
Breaking: This release removes the themes implementation of
ref/relrefin favor for Hugos standard implementation. This is because of inconsistencies with the themes implementation. In advantage, your project becomes standard complient and exchanging this theme in your project to some other theme will be effortless.In a standard complient form you must not link to the
*.mdfile but to its logical name. You’ll see, referencing other pages becomes much easier. All three types result in the same reference:Type Non-Standard Standard Branch bundle basics/configuration/_index.mdbasics/configurationLeaf bundle basics/configuration/index.mdbasics/configurationPage basics/configuration.mdbasics/configurationIf you’ve linked from a page of one language to a page of another language, conversion is a bit more difficult but Hugo got you covered as well.
Also, the old themes implementation allowed refs to non-existing content. This will cause Hugos implementation to show the error below and abort the generation. If your project relies on this old behavior, you can reconfigure the error handling of Hugos implementation.
In the best case your usage of the old implementation is already standard complient and you don’t need to change anything. You’ll notice this very easily once you’ve started
hugo serverafter an upgrade and no errors are written to the console.You may see errors on the console after the update in the form:
ERROR 2021/11/19 22:29:10 [en] REF_NOT_FOUND: Ref "basics/configuration/_index.md": "hugo-theme-relearn\exampleSite\content\_index.en.md:19:22": page not foundIn this case, you must apply one of two options:
-
Copy the old implementation files
theme/hugo-theme-relearn/layouts/shortcode/ref.htmlandtheme/hugo-theme-relearn/layouts/shortcode/relref.htmlto your own projectslayouts/shortcode/ref.htmlandlayouts/shortcode/relref.htmlrespectively. This is not recommended as your project will still rely on non-standard behavior afterwards. -
Start up a text editor with regular expression support for search and replace. Apply the following conversions in the given order on all
*.mdfiles. This is the recommended choice.
Type Search Replace by Branch bundle (ref\s+"[^"]*)/_index\.md"$1"Leaf bundle (ref\s+"[^"]*)/index\.md"$1"Page (ref\s+"[^"]*)\.md"$1" -
2.8.0
-
Change: Although never officially documented, this release removes the font
Novacento/Novecento. If you use it in an overwritten CSS please replace it withWork Sans. This change was necessary as Novacento did not provide all Latin special characters and lead to mixed styled character text eg. for czech. -
New: The theme now supports favicons served from
static/images/named asfaviconorlogoin SVG, PNG or ICO format out of the box. An overridden partiallayouts/partials/favicon.htmlmay not be necessary anymore in most cases. -
New: You can hide the table of contents menu for the whole site by setting the
disableTocoption in yourconfig.toml. For an example see the example configuration.
2.7.0
- New: Optional second parameter for
noticeshortcode to set title in box header.
2.6.0
- New: Your site can now be served from a subfolder if you set
baseURLandcanonifyURLs=truein yourconfig.toml. See the documentation for a detailed example.
2.5.0
- Change: New colors
--CODE-BLOCK-colorand--CODE-BLOCK-BG-colorwere added to provide a fallback for Hugos syntax highlightning in caseguessSyntax=trueis set. Ideally the colors are set to the same values as the ones from your chosen chroma style.
2.4.0
-
Change: Creation of customized stylesheets was simplified down to only contain the CSS variables. Everything else can and should be deleted from your custom stylesheet to assure everything works fine. For the predefined stylesheet variants, this change is already included.
-
New: Hidden pages are displayed by default in their according tags page. You can now turn off this behavior by setting
disableTagHiddenPages=truein yourconfig.toml. -
New: You can define the expansion state of your menus for the whole site by setting the
alwaysopenoption in yourconfig.toml. Please see further documentation for possible values and default behavior. -
New: New frontmatter
ordersectionsbyoption to change immediate children sorting in menu andchildrenshortcode. Possible values aretitleorweight. -
New: Alternate content of a page is now advertised in the HTML meta tags. See Hugo documentation.
2.3.0
- New: Showcase multilanguage features by provding a documentation translation “fer us pirrrates”. There will be no other translations besides the original English one and the Pirates one due to maintenance constraints.
2.2.0
- New: Hidden pages are displayed by default in the sitemap generated by Hugo and are therefore visible for search engine indexing. You can now turn off this behavior by setting
disableSeoHiddenPages=truein yourconfig.toml.
2.1.0
-
Change: In case the site’s structure contains addional *.md files not part of the site (eg files that are meant to be included by site pages - see
CHANGELOG.mdin the exampleSite), they will now be ignored by the search. -
New: Hidden pages are indexed for the site search by default. You can now turn off this behavior by setting
disableSearchHiddenPages=truein yourconfig.toml. -
New: If a search term is found in an
expandshortcode, the expand will be opened. -
New: The menu will scroll the active item into view on load.
2.0.0
-
Change: Syntaxhighlightning was switched to the built in Hugo mechanism. You may need to configure a new stylesheet or decide to roll you own as described on in the Hugo documentation
-
Change: In the predefined stylesheets there was a typo and
--MENU-HOME-LINK-HOVERED-colormust be changed to--MENU-HOME-LINK-HOVER-color. You don’t need to change anything in your custom color stylesheet as the old name will be used as a fallback. -
Change:
--MENU-HOME-LINK-colorand--MENU-HOME-LINK-HOVER-colorwere missing in the documentation. You should add them to your custom stylesheets if you want to override the defaults. -
Change: Arrow navigation and
childrenshortcode were ignoring setting forordersectionsby. This is now changed and may result in different sorting order of your sub pages. -
Change: If hidden pages are accessed directly by typing their URL, they will be exposed in the menu.
-
Change: A page without a
titlewill be treated ashidden=true. -
New: You can define the expansion state of your menus in the frontmatter. Please see further documentation for possible values and default behavior.
-
New: New partials for defining pre/post content for menu items and the content. See documentation for further reading.
-
New: Shortcode
childrenwith new parametercontainerstyle. -
New: New shortcode
includeto include arbitrary file content into a page.
1.2.0
- New: Shortcode
expandwith new parameter to open on page load.
1.1.0
- New:
Mermaidconfig options can be set inconfig.toml.
1.0.0
- New: Initial fork of the Learn theme based on Learn 2.5.0 on 2021-07-01. This introduces no new features besides a global rename to
Relearnand a new logo. For the reasons behind forking the Learn theme, see this comment in the Learn issues.
Requirements
Thanks to the simplicity of Hugo, this page is as empty as this theme needs requirements.
Just download latest version of Hugo binary for your OS (Windows, Linux, Mac) : it’s that simple.

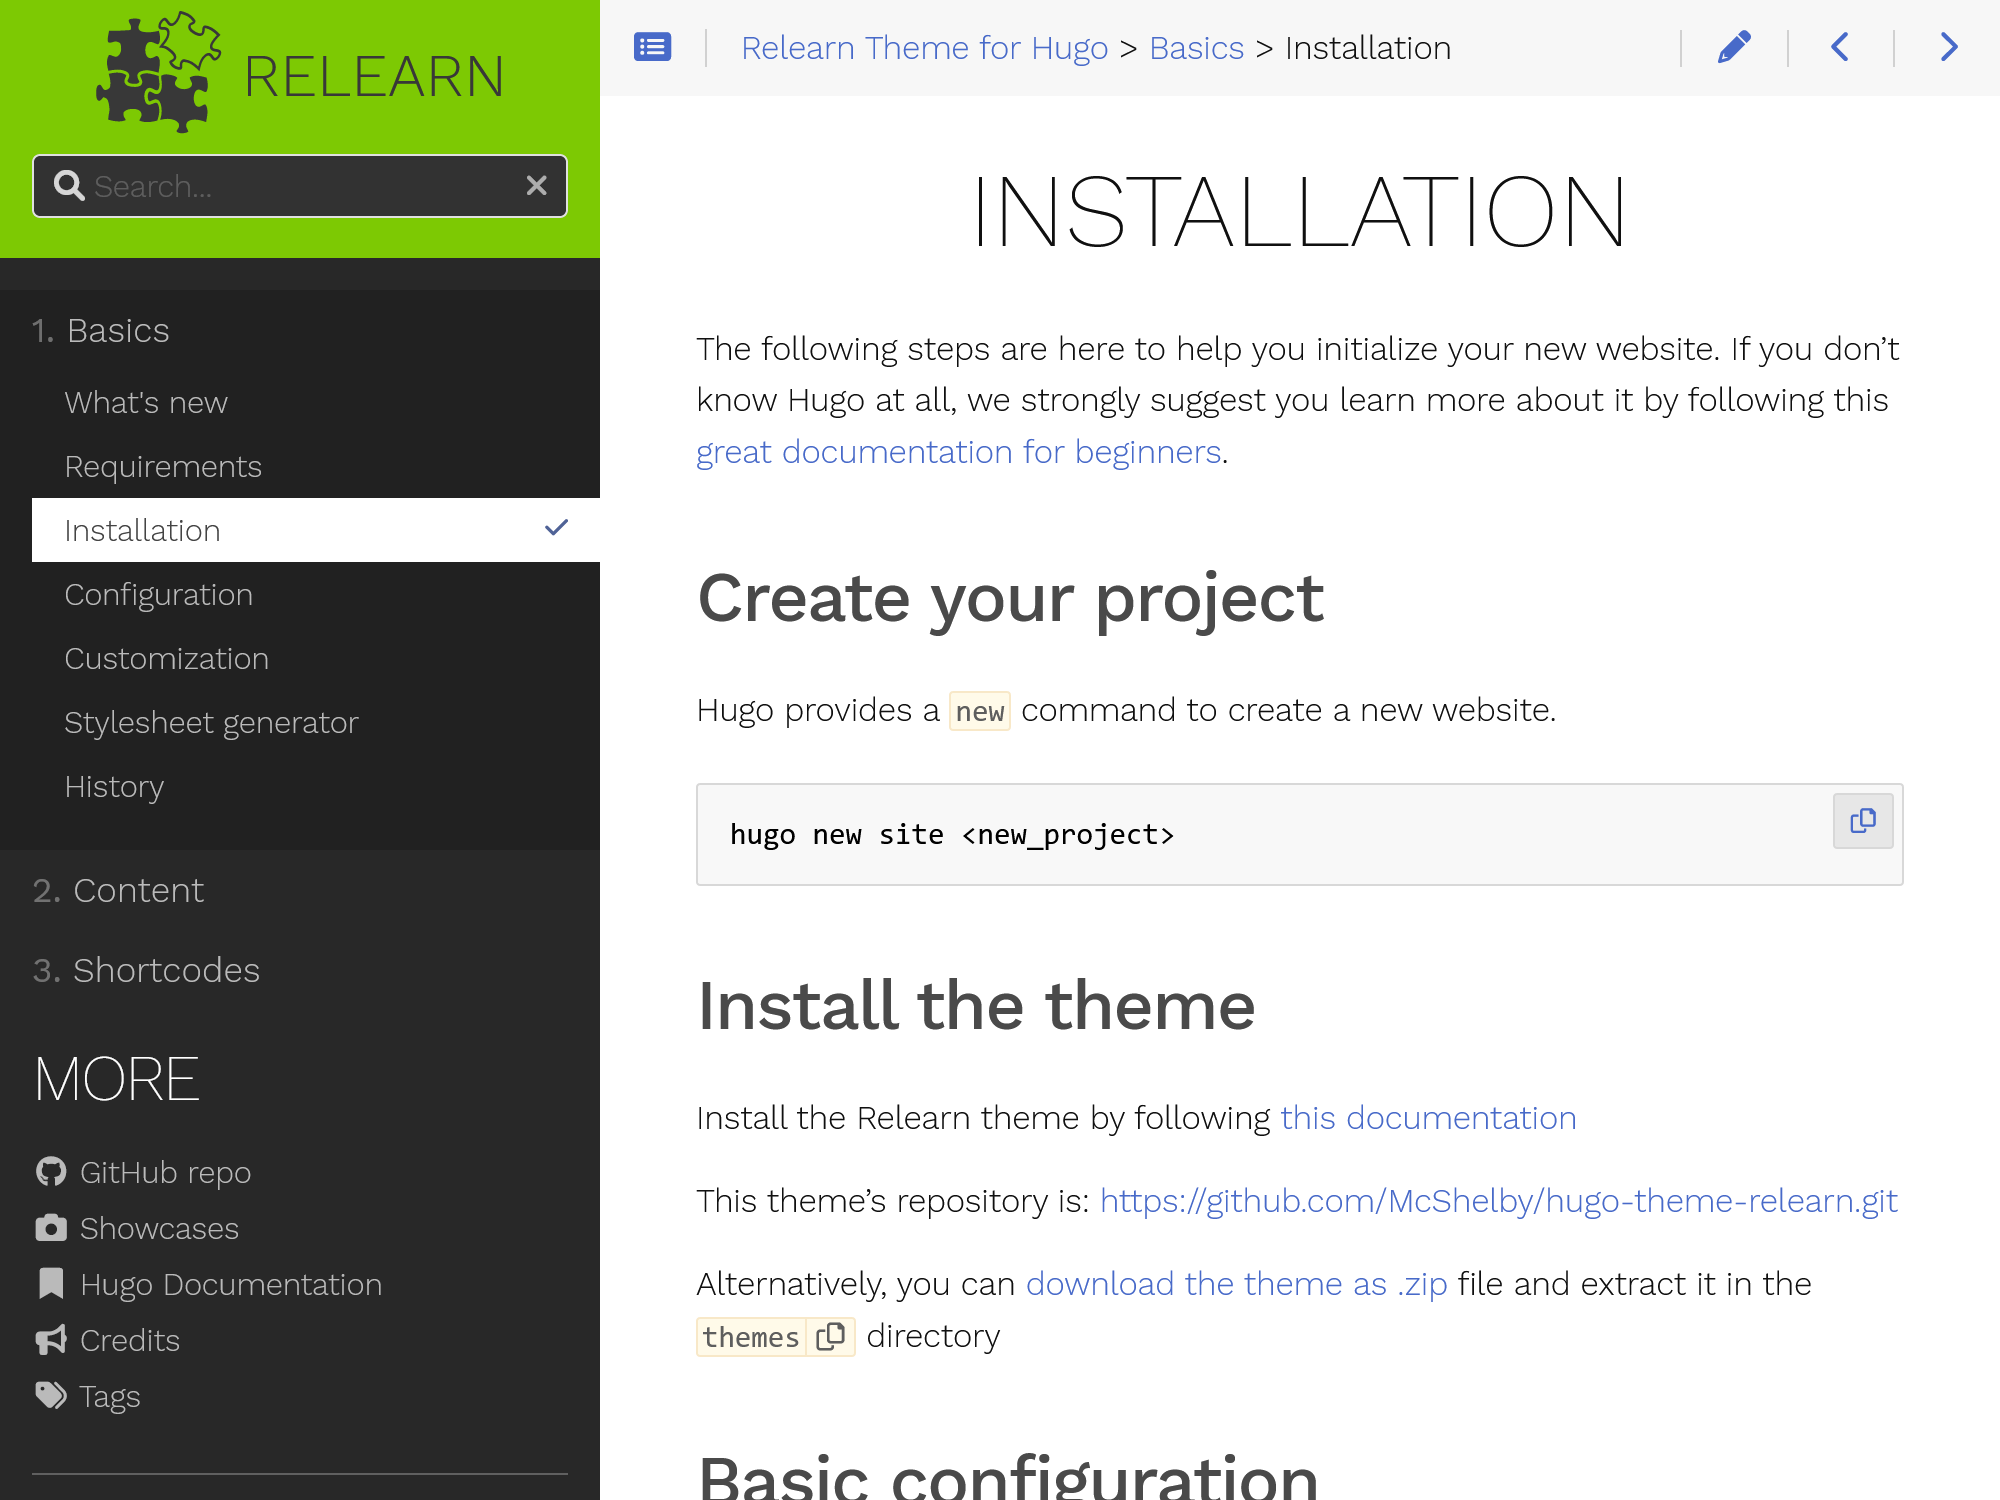
Installation
The following steps are here to help you initialize your new website. If you don’t know Hugo at all, we strongly suggest you learn more about it by following this great documentation for beginners.
Create your project
Hugo provides a new command to create a new website.
hugo new site <new_project>
Install the theme
Install the Relearn theme by following this documentation
This theme’s repository is: https://github.com/McShelby/hugo-theme-relearn.git
Alternatively, you can download the theme as .zip file and extract it in the themes directory
Basic configuration
When building the website, you can set a theme by using --theme option. However, we suggest you modify the configuration file (config.toml) and set the theme as the default. You can also add the [outputs] section to enable the search functionality.
# Change the default theme to be use when building the site with Hugo
theme = "hugo-theme-relearn"

# For search functionality
[outputs]
home = [ "HTML", "RSS", "JSON"]
Create your first chapter page
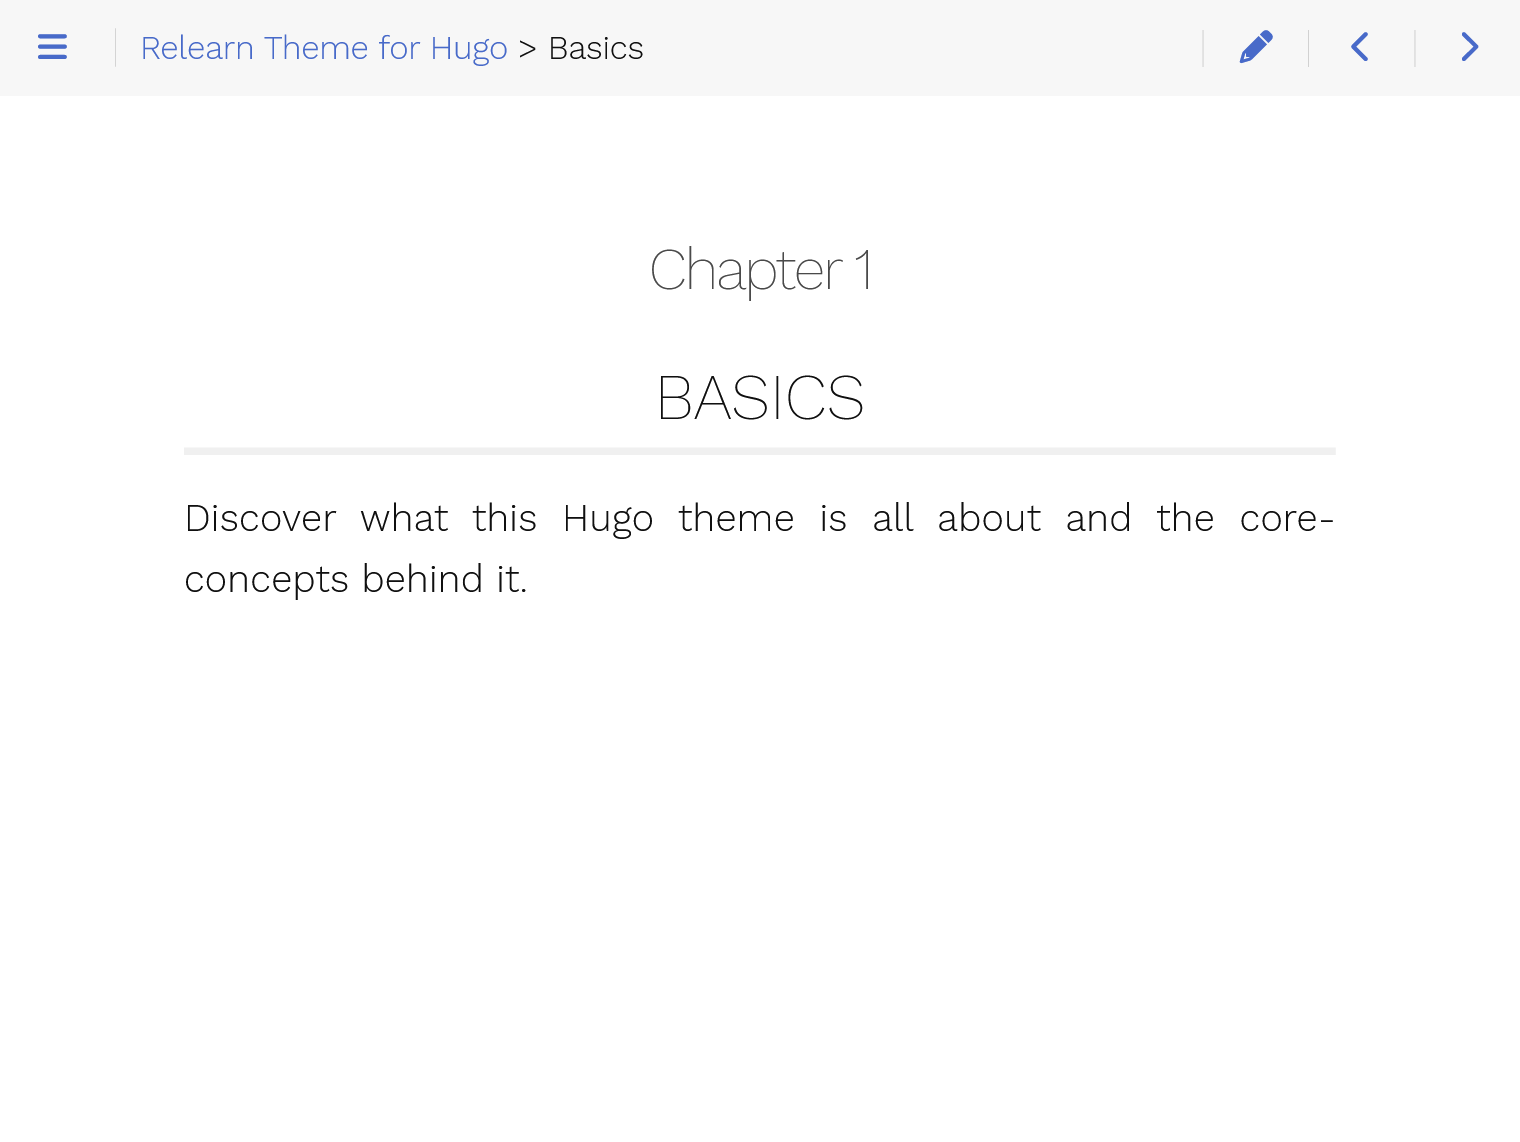
Chapters are pages that contain other child pages. It has a special layout style and usually just contains a chapter name, the title and a brief abstract of the section.
### Chapter 1

# Basics

Discover what this Hugo theme is all about and the core concepts behind it.
renders as
The Relearn theme provides archetypes to create skeletons for your website. Begin by creating your first chapter page with the following command
hugo new --kind chapter basics/_index.md
By opening the given file, you should see the property chapter=true on top, meaning this page is a chapter.
By default all chapters and pages are created as a draft. If you want to render these pages, remove the property draft: true from the metadata.
Create your first content pages
Then, create content pages inside the previously created chapter. Here are two ways to create content in the chapter:
hugo new basics/first-content.md
hugo new basics/second-content/_index.md
Feel free to edit those files by adding some sample content and replacing the title value in the beginning of the files.
Launching the website locally
Launch by using the following command:
hugo serve
Go to http://localhost:1313
You should notice three things:
- You have a left-side Basics menu, containing two submenus with names equal to the
titleproperties in the previously created files. - The home page explains how to customize it by following the instructions.
- When you run
hugo serve, when the contents of the files change, the page automatically refreshes with the changes. Neat!
Build the website
When your site is ready to deploy, run the following command:
hugo
A public folder will be generated, containing all static content and assets for your website. It can now be deployed on any web server.
Note
This website can be automatically published and hosted with Netlify (Read more about Automated HUGO deployments with Netlify). Alternatively, you can use GitHub pages
Configuration
Global site parameters
On top of Hugo global configuration, the Relearn theme lets you define the following parameters in your config.toml (here, values are default).
Note that some of these parameters are explained in details in other sections of this documentation.
[params]
  # This controls whether submenus will be expanded (true), or collapsed (false) in the
  # menu; if no setting is given, the first menu level is set to false, all others to true;
  # this can be overridden in the pages frontmatter
  alwaysopen = true
  # Prefix URL to edit current page. Will display an "Edit" button on top right hand corner of every page.
  # Useful to give opportunity to people to create merge request for your doc.
  # See the config.toml file from this documentation site to have an example.
  editURL = ""
  # Author of the site, will be used in meta information
  author = ""
  # Description of the site, will be used in meta information
  description = ""
  # Shows a checkmark for visited pages on the menu
  showVisitedLinks = false
  # Disable search function. It will hide search bar
  disableSearch = false
  # Disable search in hidden pages, otherwise they will be shown in search box
  disableSearchHiddenPages = false
  # Disables hidden pages from showing up in the sitemap and on Google (et all), otherwise they may be indexed by search engines
  disableSeoHiddenPages = false
  # Disables hidden pages from showing up on the tags page although the tag term will be displayed even if all pages are hidden
  disableTagHiddenPages = false
  # Javascript and CSS cache are automatically busted when new version of site is generated.
  # Set this to true to disable this behavior (some proxies don't handle well this optimization)
  disableAssetsBusting = false
  # Set this to true to disable copy-to-clipboard button for inline code.
  disableInlineCopyToClipBoard = false
  # A title for shortcuts in menu is set by default. Set this to true to disable it.
  disableShortcutsTitle = false
  # If set to false, a Home button will appear below the search bar on the menu.
  # It is redirecting to the landing page of the current language if specified. (Default is "/")
  disableLandingPageButton = true
  # When using mulitlingual website, disable the switch language button.
  disableLanguageSwitchingButton = false
  # Hide breadcrumbs in the header and only show the current page title
  disableBreadcrumb = true
  # If set to true, hide table of contents menu in the header of all pages
  disableToc = false
  # If set to false, load the Mermaid module on every page regardless if a Mermaid shortcode or Mermaid codefence is present
  disableMermaid = false
  # Specifies the remote location of the Mermaid js
  customMermaidURL = "https://unpkg.com/mermaid/dist/mermaid.min.js"
  # Initialization parameter for Mermaid, see Mermaid documentation
  mermaidInitialize = "{ \"theme\": \"default\" }"
  # Specifies the remote location of the RapiDoc js
  customSwaggerURL = ""https://unpkg.com/rapidoc/dist/rapidoc-min.js"
  # Initialization parameter for Swagger, see RapiDoc documentation
  swaggerInitialize = "{ \"theme\": \"light\" }"
  # Hide Next and Previous page buttons normally displayed full height beside content
  disableNextPrev = true
  # Order sections in menu by "weight" or "title". Default to "weight";
  # this can be overridden in the pages frontmatter
  ordersectionsby = "weight"
  # Change default color scheme with a variant one. Eg. can be "red", "blue", "green" or an array like [ "blue", "green" ].
  themeVariant = "relearn-light"
  # Provide a list of custom css files to load relative from the `static/` folder in the site root.
  custom_css = ["css/foo.css", "css/bar.css"]
  # Change the title separator. Default to "::".
  titleSeparator = "-"
  # If set to true, the menu in the sidebar will be displayed in a collapsible tree view.
  collapsibleMenu = false
A word on running your site in a subfolder
The theme runs best if your site is installed in the root of your webserver. If your site is served from a subfolder, eg. https://example.com/mysite/, you have to set the following lines to your config.toml
baseURL = "https://example.com/mysite/"
canonifyURLs = true
Without canonifyURLs=true URLs in sublemental pages (like sitemap.xml, rss.xml) will be generated falsly while your HTML files will still work. See https://github.com/gohugoio/hugo/issues/5226.
Activate search
If not already present, add the follow lines in the same config.toml file.
[outputs]
  home = ["HTML", "RSS", "JSON"]
Relearn theme uses the last improvement available in hugo version 20+ to generate a json index file ready to be consumed by lunr.js javascript search engine.
Hugo generate lunrjs index.json at the root of public folder. When you build the site with
hugo server, hugo generates it internally and of course it doesn’t show up in the filesystem
Activate print support
You can activate print support to add the capability to print whole chapters or even the complete site. Just add the PRINT output format to your home, section and page in your config.toml as seen below:
[outputs]
  home = ["HTML", "RSS", "PRINT", "JSON"]
  section = ["HTML", "RSS", "PRINT"]
  page = ["HTML", "RSS", "PRINT"]
This will add a little printer icon in the top bar. It will switch the page to print preview when clicked. You can then send this page to the printer by using your browser’s usual print functionality.
Note
While colors of your chosen color variant are reset to the theme’s light standard values for printing, this does not apply for Mermaid diagrams and Swagger/OpenAPI Specification. Those will still use the colors of your chosen color variant which may cause a non coherent look on paper.
Mermaid
The Mermaid configuration parameters can also be set on a specific page. In this case, the global parameter would be overwritten by the local one. See Mermaid for additional documentation.
Example:
Mermaid is globally disabled. By default it won’t be loaded by any page. On page “Architecture” you need a class diagram. You can set the Mermaid parameters locally to only load mermaid on this page (not on the others).
You also can disable Mermaid for specific pages while globally enabled.
Home Button Configuration
If the disableLandingPageButton option is set to false, a Home button will appear
on the left menu. It is an alternative for clicking on the logo. To edit the
appearance, you will have to configure two parameters for the defined languages:
[Languages]
[Languages.en]
...
landingPageURL = "/"
landingPageName = "<i class='fas fa-home'></i> Home"
...
[Languages.pir]
...
landingPageURL = "/pir/"
landingPageName = "<i class='fas fa-home'></i> Arrr! Homme"
...
If those params are not configured for a specific language, they will get their default values:
landingPageURL = "/"
landingPageName = "<i class='fas fa-home'></i> Home"
The home button is going to look like this:

Customization
The Relearn theme has been built to be as configurable as possible by defining multiple partials
In themes/hugo-theme-relearn/layouts/partials/, you will find all the partials defined for this theme. If you need to overwrite something, don’t change the code directly. Instead follow this page. You’d create a new partial in the layouts/partials folder of your local project. This partial will have the priority.
This theme defines the following partials :
header.html: the header of the page. Not meant to be overwrittenfooter.html: the footer of the page.Not meant to be overwrittenmenu.html: left menu. Not meant to be overwrittensearch.html: search box. Not meant to be overwrittencustom-header.html: custom headers in page. Meant to be overwritten when adding CSS imports. Don’t forget to includestyleHTML tag directive in your file.custom-footer.html: custom footer in page. Meant to be overwritten when adding Javacript. Don’t forget to includejavascriptHTML tag directive in your file.favicon.html: the faviconlogo.html: the logo, on top left hand cornermeta.html: HTML meta tags, if you want to change default behaviormenu-pre.html: side-wide configuration to prepend to menu items. If you override this, it is your responsiblity to take the page’spresetting into account.menu-post.html: side-wide configuration to append to menu items. If you override this, it is your responsiblity to take the page’spostsetting into account.menu-footer.html: footer of the the left menutoc.html: table of contentscontent.html: the content page itself. This can be overridden if you wan’t to display page’s meta data above or below the content.content-footer: footer below the content, has a default implementation but you can overwrite it if you don’t like it.
Change the logo
Create a new file in layouts/partials/ named logo.html. Then write any HTML you want.
You could use an img HTML tag and reference an image created under the static folder, or you could paste a SVG definition!
Note
The size of the logo will adapt automatically
Change the favicon
If your favicon is a SVG, PNG or ICO, just drop off your image in your local static/images/ folder and name it favicon.svg, favicon.png or favicon.ico respectivly.
If no favicon file is found, the theme will lookup the alternative filename logo in the same location and will repeat the search for the list of supported file types.
If you need to change this default behavior, create a new file in layouts/partials/ named favicon.html. Then write something like this:
<link rel="icon" href="/images/favicon.bmp" type="image/bmp" />
Change the colors
The Relearn theme lets you choose between some predefined color variants in light or dark mode, but feel free to add one yourself!
You can preview the shipped variants by changing them in the variant selector at the bottom of the menu.
Single variant
Set the themeVariant value with the name of your theme file. That’s it!
[params]
  themeVariant = "relearn-light"
In the above exaple your theme file has to be named theme-relearn-light.css
Multiple variants
You can also set multiple variants. In this case, the first variant is the default choosen on first view and a variant switch will be shown in the menu footer.
[params]
  # Change default color scheme with a variant one.
  themeVariant = [ "relearn-light", "relearn-dark" ]
Tip
If you want to switch the syntax highlightning theme together with your color variant, generate a syntax highlighting stylesheet and configure your installation according to Hugo’s documentation, and @import this stylesheet in your color variant stylesheet. For an example, take a look into theme-relearn-light.css and config.toml of the exampleSite.
Roll your own
If you are not happy with the shipped variants you can either copy one of the shipped files, edit them in a text editor and configure the themeVariant parameter in your config.toml or just use the interactive variant generator.
Stylesheet generator
This interactive tool may help you to generate your own color variant stylesheet.
To get started, first select a color variant from the variant switch that fits you best as a starting point.
The graph is interactive and reflect the current colors. You can click on any of the colored boxes to adjust the respective color. The graph and the page will update accordingly.
The arrowed lines reflects how colors are inherited thru different parts of the theme if the descendent isn’t overwritten. If you want to delete a color and let it inherit from its parent, just delete the value from the input field.
To better understand this select the neon variant and modify the differnet heading colors. There, colors for the heading h2, h3 and h4 are explicitly set. h5 is not set and inherits its value from h4. h6 is also not set and inherits its value from h5.
Once you’ve changed a color, the variant switch will show a “My custom variant” entry and your changes are stored in the browser. You can change pages and even close the browser without losing your changes.
Once you are satisfied, you can download the new variants file and install it in your site.
Note
This only works in modern browsers.
Variant generator
Download color variant Reset variant
Graph
History
Chapter 2
Content
Find out how to create and organize your content quickly and intuitively.
Pages organization
In Hugo, pages are the core of your site. Once it is configured, pages are definitely the added value to your documentation site.
Folders
Organize your site like any other Hugo project. Typically, you will have a content folder with all your pages.
content
├── level-one
│   ├── level-two
│   │   ├── level-three
│   │   │   ├── level-four
│   │   │   │   ├── _index.md       <-- /level-one/level-two/level-three/level-four
│   │   │   │   ├── page-4-a.md     <-- /level-one/level-two/level-three/level-four/page-4-a
│   │   │   │   ├── page-4-b.md     <-- /level-one/level-two/level-three/level-four/page-4-b
│   │   │   │   └── page-4-c.md     <-- /level-one/level-two/level-three/level-four/page-4-c
│   │   │   ├── _index.md           <-- /level-one/level-two/level-three
│   │   │   ├── page-3-a.md         <-- /level-one/level-two/level-three/page-3-a
│   │   │   ├── page-3-b.md         <-- /level-one/level-two/level-three/page-3-b
│   │   │   └── page-3-c.md         <-- /level-one/level-two/level-three/page-3-c
│   │   ├── _index.md               <-- /level-one/level-two
│   │   ├── page-2-a.md             <-- /level-one/level-two/page-2-a
│   │   ├── page-2-b.md             <-- /level-one/level-two/page-2-b
│   │   └── page-2-c.md             <-- /level-one/level-two/page-2-c
│   ├── _index.md                   <-- /level-one
│   ├── page-1-a.md                 <-- /level-one/page-1-a
│   ├── page-1-b.md                 <-- /level-one/page-1-b
│   └── page-1-c.md                 <-- /level-one/page-1-c
├── _index.md                       <-- /
└── page-top.md                     <-- /page-top
Note
_index.md is required in each folder, it’s your “folder home page”
Types
The Relearn theme defines two types of pages. Default and Chapter. Both can be used at any level of the documentation, the only difference being layout display.
Chapter
A Chapter displays a page meant to be used as introduction for a set of child pages. Commonly, it contains a simple title and a catch line to define content that can be found under it.
You can define any HTML as prefix for the menu. In the example below, it’s just a number but that could be an icon.
+++
chapter = true
pre = "<b>1. </b>"
title = "Basics"
weight = 5
+++

### Chapter 1

# Basics

Discover what this Hugo theme is all about and the core-concepts behind it.
To tell the Relearn theme to consider a page as a chapter, set chapter=true in the Front Matter of the page.
Default
A Default page is any other content page.
+++
title = "Installation"
weight = 15
+++
The following steps are here to help you initialize your new website. If you don’t know Hugo at all, we strongly suggest you to train by following this great documentation for beginners.
Create your project
Hugo provides a new command to create a new website.
hugo new site <new_project>
The Relearn theme provides archetypes to help you create this kind of pages.
Front Matter configuration
Each Hugo page has to define a Front Matter in toml, yaml or json. This site will use toml in all cases.
The Relearn theme uses the following parameters on top of Hugo ones :
+++
# Table of contents (toc) is enabled by default. Set this parameter to true to disable it.
# Note: Toc is always disabled for chapter pages
disableToc = false
# If set, this will be used for the page's menu entry (instead of the `title` attribute)
menuTitle = ""
# If set, this will explicitly override common rules for the expand state of a page's menu entry
alwaysopen = true
# If set, this will explicitly override common rules for the sorting order of a page's submenu entries
ordersectionsby = "title"
# The title of the page in menu will be prefixed by this HTML content
pre = ""
# The title of the page in menu will be postfixed by this HTML content
post = ""
# Set the page as a chapter, changing the way it's displayed
chapter = false
# Hide a menu entry by setting this to true
hidden = false
# Display name of this page modifier. If set, it will be displayed in the footer.
LastModifierDisplayName = ""
# Email of this page modifier. If set with LastModifierDisplayName, it will be displayed in the footer
LastModifierEmail = ""
+++
Add icon to a menu entry
In the page frontmatter, add a pre param to insert any HTML code before the menu label. The example below uses the GitHub icon.
+++
title = "GitHub repo"
pre = "<i class='fab fa-github'></i> "
+++
![]()
Ordering sibling menu/page entries
Hugo provides a flexible way to handle order for your pages.
The simplest way is to set weight parameter to a number.
+++
title = "My page"
weight = 5
+++
Using a custom title for menu entries
By default, the Relearn theme will use a page’s title attribute for the menu item (or linkTitle if defined).
But a page’s title has to be descriptive on its own while the menu is a hierarchy.
We’ve added the menuTitle parameter for that purpose:
For example (for a page named content/install/linux.md):
+++
title = "Install on Linux"
menuTitle = "Linux"
+++
Override expand state rules for menu entries
You can change how the theme expands menu entries on the side of the content with the alwaysopen setting on a per page basis. If alwaysopen=false for any given entry, its children will not be shown in the menu as long as it is not necessary for the sake of navigation.
The theme generates the menu based on the following rules:
- all parent entries of the active page including their siblings are shown regardless of any settings
- immediate children entries of the active page are shown regardless of any settings
- if not overridden, all other first level entries behave like they would have been given
alwaysopen=false - if not overridden, all other entries of levels besides the first behave like they would have been given
alwaysopen=true - all visible entries show their immediate children entries if
alwaysopen=true; this proceeds recursivley - all remaining entries are not shown
You can see this feature in action on the example page for children shortcode and its children pages.
Your Page
To configure your page, you basically have three choices:
- Create an
_index.mddocument incontentfolder and fill the file with Markdown content - Create an
index.htmlfile in thestaticfolder and fill the file with HTML content - Configure your server to automatically redirect home page to one your documentation page
Archetypes
Using the command: hugo new [relative new content path], you can start a content file with the date and title automatically set. While this is a welcome feature, active writers need more: archetypes.
It is pre-configured skeleton pages with default front matter. Please refer to the documentation for types of page to understand the differences.
Chapter
To create a Chapter page, run the following commands
hugo new --kind chapter <name>/_index.md
It will create a page with predefined Front-Matter:
+++
chapter = true
pre = "<b>X. </b>"
title = "{{ replace .Name "-" " " | title }}"
weight = 5
+++

### Chapter X

# Some Chapter title

Lorem Ipsum.
Default
To create a default page, run either one of the following commands either
hugo new <chapter>/<name>/_index.md
or
hugo new <chapter>/<name>.md
It will create a page with predefined Front-Matter:
+++
title = "{{ replace .Name "-" " " | title }}"
weight = 5
+++

Lorem Ipsum.
Markdown syntax
Let’s face it: Writing content for the Web is tiresome. WYSIWYG editors help alleviate this task, but they generally result in horrible code, or worse yet, ugly web pages.
Markdown is a better way to write HTML, without all the complexities and ugliness that usually accompanies it.
Some of the key benefits are:
- Markdown is simple to learn, with minimal extra characters so it’s also quicker to write content.
- Less chance of errors when writing in Markdown.
- Produces valid XHTML output.
- Keeps the content and the visual display separate, so you cannot mess up the look of your site.
- Write in any text editor or Markdown application you like.
- Markdown is a joy to use!
John Gruber, the author of Markdown, puts it like this:
The overriding design goal for Markdown’s formatting syntax is to make it as readable as possible. The idea is that a Markdown-formatted document should be publishable as-is, as plain text, without looking like it’s been marked up with tags or formatting instructions. While Markdown’s syntax has been influenced by several existing text-to-HTML filters, the single biggest source of inspiration for Markdown’s syntax is the format of plain text email. John Gruber
Without further delay, let us go over the main elements of Markdown and what the resulting HTML looks like:
Info
Bookmark this page and the official Commonmark reference for easy future reference!
Headings
Headings from h1 through h6 are constructed with a # for each level:
# h1 Heading
## h2 Heading
### h3 Heading
#### h4 Heading
##### h5 Heading
###### h6 Heading
Renders to:
h1 Heading
h2 Heading
h3 Heading
h4 Heading
h5 Heading
h6 Heading
HTML:
<h1>h1 Heading</h1>
<h2>h2 Heading</h2>
<h3>h3 Heading</h3>
<h4>h4 Heading</h4>
<h5>h5 Heading</h5>
<h6>h6 Heading</h6>
Comments
Comments should be HTML compatible
<!--
This is a comment
-->
Comment below should NOT be seen:
Horizontal Rules
The HTML <hr> element is for creating a “thematic break” between paragraph-level elements. In Markdown, you can create a <hr> with --- - three consecutive dashes
renders to:
Paragraphs
Any text not starting with a special sign is written as normal, plain text and will be wrapped within <p></p> tags in the rendered HTML.
So this body copy:
Lorem ipsum dolor sit amet, graecis denique ei vel, at duo primis mandamus. Et legere ocurreret pri, animal tacimates complectitur ad cum. Cu eum inermis inimicus efficiendi. Labore officiis his ex, soluta officiis concludaturque ei qui, vide sensibus vim ad.
renders to this HTML:
<p>Lorem ipsum dolor sit amet, graecis denique ei vel, at duo primis mandamus. Et legere ocurreret pri, animal tacimates complectitur ad cum. Cu eum inermis inimicus efficiendi. Labore officiis his ex, soluta officiis concludaturque ei qui, vide sensibus vim ad.</p>
Text Markers
Bold
For emphasizing a snippet of text with a heavier font-weight.
The following snippet of text is rendered as bold text.
**rendered as bold text**
renders to:
rendered as bold text
and this HTML
<strong>rendered as bold text</strong>
Italics
For emphasizing a snippet of text with italics.
The following snippet of text is rendered as italicized text.
_rendered as italicized text_
renders to:
rendered as italicized text
and this HTML:
<em>rendered as italicized text</em>
Strikethrough
In GFM (GitHub flavored Markdown) you can do strikethroughs.
~~Strike through this text.~~
Which renders to:
Strike through this text.
HTML:
<del>Strike through this text.</del>
Blockquotes
For quoting blocks of content from another source within your document.
Add > before any text you want to quote.
> **Fusion Drive** combines a hard drive with a flash storage (solid-state drive) and presents it as a single logical volume with the space of both drives combined.
Renders to:
Fusion Drive combines a hard drive with a flash storage (solid-state drive) and presents it as a single logical volume with the space of both drives combined.
and this HTML:
<blockquote>
  <p><strong>Fusion Drive</strong> combines a hard drive with a flash storage (solid-state drive) and presents it as a single logical volume with the space of both drives combined.</p>
</blockquote>
Blockquotes can also be nested:
> Donec massa lacus, ultricies a ullamcorper in, fermentum sed augue. Nunc augue augue, aliquam non hendrerit ac, commodo vel nisi.
>
> > Sed adipiscing elit vitae augue consectetur a gravida nunc vehicula. Donec auctor odio non est accumsan facilisis. Aliquam id turpis in dolor tincidunt mollis ac eu diam.
>
> Mauris sit amet ligula egestas, feugiat metus tincidunt, luctus libero. Donec congue finibus tempor. Vestibulum aliquet sollicitudin erat, ut aliquet purus posuere luctus.
Renders to:
Donec massa lacus, ultricies a ullamcorper in, fermentum sed augue. Nunc augue augue, aliquam non hendrerit ac, commodo vel nisi.
Sed adipiscing elit vitae augue consectetur a gravida nunc vehicula. Donec auctor odio non est accumsan facilisis. Aliquam id turpis in dolor tincidunt mollis ac eu diam.
Mauris sit amet ligula egestas, feugiat metus tincidunt, luctus libero. Donec congue finibus tempor. Vestibulum aliquet sollicitudin erat, ut aliquet purus posuere luctus.
Lists
Unordered
A list of items in which the order of the items does not explicitly matter.
You may use any of the following symbols to denote bullets for each list item:
* valid bullet
- valid bullet
+ valid bullet
For example
+ Lorem ipsum dolor sit amet
+ Consectetur adipiscing elit
+ Integer molestie lorem at massa
+ Facilisis in pretium nisl aliquet
+ Nulla volutpat aliquam velit
  - Phasellus iaculis neque
  - Purus sodales ultricies
  - Vestibulum laoreet porttitor sem
  - Ac tristique libero volutpat at
+ Faucibus porta lacus fringilla vel
+ Aenean sit amet erat nunc
+ Eget porttitor lorem
Renders to:
- Lorem ipsum dolor sit amet
- Consectetur adipiscing elit
- Integer molestie lorem at massa
- Facilisis in pretium nisl aliquet
- Nulla volutpat aliquam velit
- Phasellus iaculis neque
- Purus sodales ultricies
- Vestibulum laoreet porttitor sem
- Ac tristique libero volutpat at
- Faucibus porta lacus fringilla vel
- Aenean sit amet erat nunc
- Eget porttitor lorem
And this HTML
<ul>
  <li>Lorem ipsum dolor sit amet</li>
  <li>Consectetur adipiscing elit</li>
  <li>Integer molestie lorem at massa</li>
  <li>Facilisis in pretium nisl aliquet</li>
  <li>Nulla volutpat aliquam velit
    <ul>
      <li>Phasellus iaculis neque</li>
      <li>Purus sodales ultricies</li>
      <li>Vestibulum laoreet porttitor sem</li>
      <li>Ac tristique libero volutpat at</li>
    </ul>
  </li>
  <li>Faucibus porta lacus fringilla vel</li>
  <li>Aenean sit amet erat nunc</li>
  <li>Eget porttitor lorem</li>
</ul>
Ordered
A list of items in which the order of items does explicitly matter.
1. Lorem ipsum dolor sit amet
4. Consectetur adipiscing elit
2. Integer molestie lorem at massa
8. Facilisis in pretium nisl aliquet
4. Nulla volutpat aliquam velit
99. Faucibus porta lacus fringilla vel
21. Aenean sit amet erat nunc
6. Eget porttitor lorem
Renders to:
- Lorem ipsum dolor sit amet
- Consectetur adipiscing elit
- Integer molestie lorem at massa
- Facilisis in pretium nisl aliquet
- Nulla volutpat aliquam velit
- Faucibus porta lacus fringilla vel
- Aenean sit amet erat nunc
- Eget porttitor lorem
And this HTML:
<ol>
  <li>Lorem ipsum dolor sit amet</li>
  <li>Consectetur adipiscing elit</li>
  <li>Integer molestie lorem at massa</li>
  <li>Facilisis in pretium nisl aliquet</li>
  <li>Nulla volutpat aliquam velit</li>
  <li>Faucibus porta lacus fringilla vel</li>
  <li>Aenean sit amet erat nunc</li>
  <li>Eget porttitor lorem</li>
</ol>
Tip
If you just use 1. for each number, Markdown will automatically number each item. For example:
1. Lorem ipsum dolor sit amet
1. Consectetur adipiscing elit
1. Integer molestie lorem at massa
1. Facilisis in pretium nisl aliquet
1. Nulla volutpat aliquam velit
1. Faucibus porta lacus fringilla vel
1. Aenean sit amet erat nunc
1. Eget porttitor lorem
Renders to:
- Lorem ipsum dolor sit amet
- Consectetur adipiscing elit
- Integer molestie lorem at massa
- Facilisis in pretium nisl aliquet
- Nulla volutpat aliquam velit
- Faucibus porta lacus fringilla vel
- Aenean sit amet erat nunc
- Eget porttitor lorem
Code
Inline code
Wrap inline snippets of code with `.
In this example, `<div></div>` should be wrapped as **code**.
Renders to:
In this example, <div></div> should be wrapped as code.
HTML:
<p>In this example, <code><div></div></code> should be wrapped as <strong>code</strong>.</p>
Indented code
Or indent several lines of code by at least two spaces, as in:
    // Some comments
    line 1 of code
    line 2 of code
    line 3 of code
Renders to:
// Some comments
line 1 of code
line 2 of code
line 3 of code
HTML:
<pre>
  <code>
    // Some comments
    line 1 of code
    line 2 of code
    line 3 of code
  </code>
</pre>
Block code “fences”
Use “fences” ``` to block in multiple lines of code.
```
Sample text here...
```
HTML:
<pre>
  <code>Sample text here...</code>
</pre>
Syntax highlighting
GFM, or “GitHub Flavored Markdown” also supports syntax highlighting. To activate it, usually you simply add the file extension of the language you want to use directly after the first code “fence”, ```js, and syntax highlighting will automatically be applied in the rendered HTML.
See Code Highlighting for additional documentation.
For example, to apply syntax highlighting to JavaScript code:
```js
grunt.initConfig({
  assemble: {
    options: {
      assets: 'docs/assets',
      data: 'src/data/*.{json,yml}',
      helpers: 'src/custom-helpers.js',
      partials: ['src/partials/**/*.{hbs,md}']
    },
    pages: {
      options: {
        layout: 'default.hbs'
      },
      files: {
        './': ['src/templates/pages/index.hbs']
      }
    }
  }
};
```
Renders to:
grunt.initConfig({
  assemble: {
    options: {
      assets: 'docs/assets',
      data: 'src/data/*.{json,yml}',
      helpers: 'src/custom-helpers.js',
      partials: ['src/partials/**/*.{hbs,md}']
    },
    pages: {
      options: {
        layout: 'default.hbs'
      },
      files: {
        './': ['src/templates/pages/index.hbs']
      }
    }
  }
};
Tables
Tables are created by adding pipes as dividers between each cell, and by adding a line of dashes (also separated by bars) beneath the header. Note that the pipes do not need to be vertically aligned.
| Option | Description |
| ------ | ----------- |
| data   | path to data files to supply the data that will be passed into templates. |
| engine | engine to be used for processing templates. Handlebars is the default. |
| ext    | extension to be used for dest files. |
Renders to:
| Option | Description |
|---|---|
| data | path to data files to supply the data that will be passed into templates. |
| engine | engine to be used for processing templates. Handlebars is the default. |
| ext | extension to be used for dest files. |
And this HTML:
<table>
  <tr>
    <th>Option</th>
    <th>Description</th>
  </tr>
  <tr>
    <td>data</td>
    <td>path to data files to supply the data that will be passed into templates.</td>
  </tr>
  <tr>
    <td>engine</td>
    <td>engine to be used for processing templates. Handlebars is the default.</td>
  </tr>
  <tr>
    <td>ext</td>
    <td>extension to be used for dest files.</td>
  </tr>
</table>
Right aligned text
Adding a colon on the right side of the dashes below any heading will right align text for that column.
| Option | Description |
| ------:| -----------:|
| data   | path to data files to supply the data that will be passed into templates. |
| engine | engine to be used for processing templates. Handlebars is the default. |
| ext    | extension to be used for dest files. |
| Option | Description |
|---|---|
| data | path to data files to supply the data that will be passed into templates. |
| engine | engine to be used for processing templates. Handlebars is the default. |
| ext | extension to be used for dest files. |
Two tables adjacent
| Option | Description |
|---|---|
| ext | extension to be used for dest files. |
| Option | Description |
|---|---|
| ext | extension to be used for dest files. |
Links
Basic link
[Assemble](http://assemble.io)
Renders to (hover over the link, there is no tooltip):
HTML:
<a href="http://assemble.io">Assemble</a>
Add a tooltip
[Upstage](https://github.com/upstage/ "Visit Upstage!")
Renders to (hover over the link, there should be a tooltip):
HTML:
<a href="https://github.com/upstage/" title="Visit Upstage!">Upstage</a>
Named Anchors
Named anchors enable you to jump to the specified anchor point on the same page. For example, each of these chapters:
# Table of Contents
  * [Chapter 1](#chapter-1)
  * [Chapter 2](#chapter-2)
  * [Chapter 3](#chapter-3)
will jump to these sections:
## Chapter 1 <a id="chapter-1"></a>
Content for chapter one.

## Chapter 2 <a id="chapter-2"></a>
Content for chapter one.

## Chapter 3 <a id="chapter-3"></a>
Content for chapter one.
NOTE that specific placement of the anchor tag seems to be arbitrary. They are placed inline here since it seems to be unobtrusive, and it works.
Images
Images have a similar syntax to links but include a preceding exclamation point.


or


Like links, Images also have a footnote style syntax
Alternative usage : note images
![Alt text][id]

With a reference later in the document defining the URL location:
[id]: https://octodex.github.com/images/dojocat.jpg "The Dojocat"
Further image formatting
The Hugo Markdown parser supports additional non-standard functionality.
Resizing image
Add HTTP parameters width and/or height to the link image to resize the image. Values are CSS values (default is auto).


Add CSS classes
Add a HTTP classes parameter to the link image to add CSS classes. shadowand border are available but you could define other ones.


Lightbox
Add a HTTP featherlight parameter to the link image to disable lightbox. By default lightbox is enabled using the featherlight.js plugin. You can disable this by defining featherlight to false.


Code highlighting
The Relearn theme uses Hugo’s built-in syntax highlighting for code.
Markdown syntax
Wrap the code block with three backticks and the name of the language. Highlight will try to auto detect the language if one is not provided.
```json
[
  {
    "title": "apples",
    "count": [12000, 20000],
    "description": {"text": "...", "sensitive": false}
  },
  {
    "title": "oranges",
    "count": [17500, null],
    "description": {"text": "...", "sensitive": false}
  }
]
```
Renders to:
[
  {
    "title": "apples",
    "count": [12000, 20000],
    "description": {"text": "...", "sensitive": false}
  },
  {
    "title": "oranges",
    "count": [17500, null],
    "description": {"text": "...", "sensitive": false}
  }
]
Supported languages
Hugo comes with a remarkable list of supported languages.
Recommended configuration
You can choose a color theme from the list of supported themes and add it in your config.toml
[markup]
  [markup.highlight]
    # if set to `guessSyntax = true`, there will be no unstyled code even if no language
    # was given BUT mermaid code fences will not work anymore! So this is a mandatory
    # setting for your site
    guessSyntax = false

    # choose a color theme or create your own
    style = "base16-snazzy"
Menu extra shortcuts
You can define additional menu entries or shortcuts in the navigation menu without any link to content.
Basic configuration
Edit the website configuration config.toml and add a [[menu.shortcuts]] entry for each link your want to add.
Example from the current website:
[[menu.shortcuts]]
name = "<i class='fab fa-fw fa-github'></i> GitHub repo"
identifier = "ds"
url = "https://github.com/McShelby/hugo-theme-relearn"
weight = 10

[[menu.shortcuts]]
name = "<i class='fas fa-fw fa-camera'></i> Showcases"
url = "more/showcase/"
weight = 11

[[menu.shortcuts]]
name = "<i class='fas fa-fw fa-bookmark'></i> Hugo Documentation"
identifier = "hugodoc"
url = "https://gohugo.io/"
weight = 20

[[menu.shortcuts]]
name = "<i class='fas fa-fw fa-bullhorn'></i> Credits"
url = "more/credits/"
weight = 30

[[menu.shortcuts]]
name = "<i class='fas fa-fw fa-tags'></i> Tags"
url = "tags/"
weight = 40
By default, shortcuts are preceded by a title. This title can be disabled by setting disableShortcutsTitle=true.
However, if you want to keep the title but change its value, it can be overriden by changing your local i18n translation string configuration.
For example, in your local i18n/en.toml file, add the following content
[Shortcuts-Title]
other = "<Your value>"
Read more about hugo menu and hugo i18n translation strings
Configuration for Multilingual mode
When using a multilingual website, you can set different menus for each language. In the config.toml file, prefix your menu configuration by Languages.<language-id>.
Example from the current website:
[Languages]
  [Languages.en]
    title = "Hugo Relearn Theme"
    weight = 1
    languageName = "English"
    landingPageURL = "/"
    landingPageName = "<i class='fas fa-home'></i> Home"

  [[Languages.en.menu.shortcuts]]
    name = "<i class='fab fa-fw fa-github'></i> GitHub repo"
    identifier = "ds"
    url = "https://github.com/McShelby/hugo-theme-relearn"
    weight = 10

  [[Languages.en.menu.shortcuts]]
    name = "<i class='fas fa-fw fa-camera'></i> Showcases"
    url = "more/showcase/"
    weight = 11

  [[Languages.en.menu.shortcuts]]
    name = "<i class='fas fa-fw fa-bookmark'></i> Hugo Documentation"
    identifier = "hugodoc"
    url = "https://gohugo.io/"
    weight = 20

  [[Languages.en.menu.shortcuts]]
    name = "<i class='fas fa-fw fa-bullhorn'></i> Credits"
    url = "more/credits/"
    weight = 30

  [[Languages.en.menu.shortcuts]]
    name = "<i class='fas fa-fw fa-tags'></i> Tags"
    url = "tags/"
    weight = 40

  [Languages.pir]
    title = "Cap'n Hugo Relearrrn Theme"
    weight = 1
    languageName = "Arrr! Pirrrates"
    landingPageURL = "/pir/"
    landingPageName = "<i class='fas fa-home'></i> Arrr! Home"

  [[Languages.pir.menu.shortcuts]]
    name = "<i class='fab fa-fw fa-github'></i> GitHub repo"
    identifier = "ds"
    url = "https://github.com/McShelby/hugo-theme-relearn"
    weight = 10

  [[Languages.pir.menu.shortcuts]]
    name = "<i class='fas fa-fw fa-camera'></i> Showcases"
    url = "more/showcase/"
    weight = 11

  [[Languages.pir.menu.shortcuts]]
    name = "<i class='fas fa-fw fa-bookmark'></i> Cap'n Hugo Documentat'n"
    identifier = "hugodoc"
    url = "https://gohugo.io/"
    weight = 20

  [[Languages.pir.menu.shortcuts]]
    name = "<i class='fas fa-fw fa-bullhorn'></i> Crrredits"
    url = "more/credits/"
    weight = 30

  [[Languages.pir.menu.shortcuts]]
    name = "<i class='fas fa-fw fa-tags'></i> Arrr! Tags"
    url = "tags/"
    weight = 40
Read more about hugo menu and hugo multilingual menus
Icons and logos
The Relearn theme for Hugo loads the Font Awesome library, allowing you to easily display any icon or logo available in the Font Awesome free collection.
Finding an icon
Browse through the available icons in the Font Awesome Gallery. Notice that the free filter is enabled, as only the free icons are available by default.
Once on the Font Awesome page for a specific icon, for example the page for the heart, copy the HTML reference and paste into the Markdown content.
The HTML to include the heart icon is:
<i class="fas fa-heart"></i>
Including in markdown
Paste the <i> HTML into markup and Font Awesome will load the relevant icon.
Built with <i class="fas fa-heart"></i> by Relearn and Hugo
Which appears as
Built with by Relearn and Hugo
Customising icons
Font Awesome provides many ways to modify the icon
- Change color (by default the icon will inherit the parent color)
- Increase or decrease size
- Rotate
- Combine with other icons
Check the full documentation on web fonts with CSS for more.
Multilingual and i18n
The Relearn theme is fully compatible with Hugo multilingual mode.
It provides:
- Translation strings for default values (English, Piratized English, Arabic, Simplified Chinese, Traditional Chinesse, Dutch, French, German, Hindi, Indonesian, Japanese, Korean, Portuguese, Russian, Spanish, Turkish, Vietnamese). Feel free to contribute!
- Automatic menu generation from multilingual content
- In-browser language switching
Basic configuration
After learning how Hugo handle multilingual websites, define your languages in your config.toml file.
For example with current English and Piratized English website.
# English is the default language
defaultContentLanguage = "en"

[Languages]
[Languages.en]
title = "Hugo Relearn Theme"
weight = 1
languageName = "English"

[Languages.pir]
title = "Cap'n Hugo Relearrrn Theme"
weight = 2
languageName = "Arrr! Pirrrates"
Then, for each new page, append the id of the language to the file.
- Single file
my-page.mdis split in two files:- in English:
my-page.md - in Piratized English:
my-page.pir.md
- in English:
- Single file
_index.mdis split in two files:- in English:
_index.md - in Piratized English:
_index.pir.md
- in English:
Info
Be aware that only translated pages are displayed in menu. It’s not replaced with default language content.
Tip
Use slug Front Matter parameter to translate urls too.
Overwrite translation strings
Translations strings are used for common default values used in the theme (Edit button, Search placeholder and so on). Translations are available in English and Piratized English but you may use another language or want to override default values.
To override these values, create a new file in your local i18n folder i18n/<idlanguage>.toml and inspire yourself from the theme themes/hugo-theme-relearn/i18n/en.toml
Disable language switching
Switching the language in the browser is a great feature, but for some reasons you may want to disable it.
Just set disableLanguageSwitchingButton=true in your config.toml
[params]
  # When using mulitlingual website, disable the switch language button.
  disableLanguageSwitchingButton = true
Tags
The Relearn theme supports one default taxonomy of Hugo: the tag feature.
Configuration
Just add tags to any page:
+++
tags = ["tutorial", "theme"]
title = "Theme tutorial"
weight = 15
+++
Behavior
The tags are displayed at the top of the page, in their insertion order.
Each tag is a link to a Taxonomy page displaying all the articles with the given tag.
List all the tags
In the config.toml file you can add a shortcut to display all the tags
[[menu.shortcuts]]
name = "<i class='fas fa-tags'></i> Tags"
url = "/tags"
weight = 30
Chapter 3
Shortcodes
Hugo uses Markdown for its simple content format. However, there are a lot of things that Markdown doesn’t support well. You could use pure HTML to expand possibilities.
But this happens to be a bad idea. Everyone uses Markdown because it’s pure and simple to read even non-rendered. You should avoid HTML to keep it as simple as possible.
To avoid this limitations, Hugo created shortcodes. A shortcode is a simple snippet inside a page.
The Relearn theme provides multiple shortcodes on top of existing ones.
Attachments
The Attachments shortcode displays a list of files attached to a page
Button
Nice buttons on your page
Children
List the child pages of a page
Expand
Displays an expandable/collapsible section of text on your page
Include
Displays content from other Markdown files
Mermaid
Generation of diagram and flowchart from text in a similar manner as Markdown
Notice
Disclaimers to help you structure your page
Site param
Get value of site params variables in your page
Swagger
Adds UI for your Swagger / OpenAPI Specifications
Tabbed views
Synchronize selection of content in different tabbed views
Attachments
The Attachments shortcode displays a list of files attached to a page.
Usage
The shortcurt lists files found in a specific folder. Currently, it support two implementations for pages
-
If your page is a Markdown file, attachements must be placed in a folder named like your page and ending with .files.
- content
- _index.md
- page.files
- attachment.pdf
- page.md
- content
-
If your page is a folder, attachements must be placed in a nested ‘files’ folder.
- content
- _index.md
- page
- index.md
- files
- attachment.pdf
- content
Be aware that if you use a multilingual website, you will need to have as many folders as languages.
That’s all!
Parameters
| Parameter | Default | Description |
|---|---|---|
| title | “Attachments” | List’s title |
| icon | “paperclip” | Sets the icon near the title; if you want no icon at all, you have to set this parameter to " " (a non empty string filled with spaces) |
| sort | “asc” | Sorting the output in ascending or descending order |
| style | "" | Choose between orange, grey, blue and green for nice style |
| pattern | “.*” | A regular expressions, used to filter the attachments by file name. The pattern parameter value must be regular expressions. |
For example:
- To match a file suffix of ‘jpg’, use *.jpg (not *.jpg).
- To match file names ending in ‘jpg’ or ‘png’, use .*(jpg|png)
Examples
List of attachments ending in pdf or mp4
{{%attachments title="Related files" pattern=".*(pdf|mp4)"/%}}
renders as
Colored styled box
{{%attachments style="orange" /%}}
renders as
{{%attachments style="grey" /%}}
renders as
{{%attachments style="blue" /%}}
renders as
{{%attachments style="green" /%}}
renders as
Button
A button is a just a clickable button with optional icon.
{{% button href="https://gohugo.io/" %}}Get Hugo{{% /button %}}
{{% button href="https://gohugo.io/" icon="fas fa-download" %}}Get Hugo with icon{{% /button %}}
{{% button href="https://gohugo.io/" icon="fas fa-download" icon-position="right" %}}Get Hugo with icon right{{% /button %}}
Children
Use the children shortcode to list the child pages of a page and the further descendants (children’s children). By default, the shortcode displays links to the child pages.
Usage
| Parameter | Default | Description |
|---|---|---|
| page | current | Specify the page name (section name) to display children for |
| containerstyle | “ul” | Choose the style used to group all children. It could be any HTML tag name |
| style | “li” | Choose the style used to display each descendant. It could be any HTML tag name |
| showhidden | “false” | When true, child pages hidden from the menu will be displayed |
| description | “false” | Allows you to include a short text under each page in the list. When no description exists for the page, children shortcode takes the first 70 words of your content. Read more info about summaries on gohugo.io |
| depth | 1 | Enter a number to specify the depth of descendants to display. For example, if the value is 2, the shortcode will display 2 levels of child pages. Tips: set 999 to get all descendants |
| sort | ordersectionsby | Sort children by weight, to sort on menu order - title, to sort alphabetically on menu label. If not set it is sorted by the ordersectionsby setting of the site and the pages frontmatter |
Demo
{{% children %}}
{{% children description="true" %}}
- page X
- page 1
- page 2
- page 3
This is a plain page test, and the beginning of a YAML multiline description...
This is a demo child page
This is a demo child page with no description. So its content is used as description.
This is a demo child page
{{% children depth="999" showhidden="true" %}}
{{% children containerstyle="div" style="h2" depth="3" description="true" %}}
page X
This is a plain page test, and the beginning of a YAML multiline description...
page 1
This is a demo child page
page 1-1
This is a demo child page
page 1-1-2
This is a demo child page
page 1-1-3
This is a demo child page
page 2
This is a demo child page with no description. So its content is used as description.
page 3
This is a demo child page
page 3-1
This is a plain page test nested in a parent
{{% children containerstyle="div" style="div" depth="999" %}}
page X
This is a plain demo child page.
page 1
This is a demo child page.
Subpages of this page
page 1-1
This is a demo child page with a hidden child. You can still access the hidden child directly or via the search.
Subpages of this page
page 1-1-2
This is a plain demo child page.
Subpages of this page
page 1-1-2-1
This is a plain demo child page.
page 1-1-2-2
This is a plain demo child page.
page 1-1-3
This is a plain demo child page.
page 2
This is a demo child page with no description.
So its content is used as description.
page 3
This is a demo child page.
Subpages of this page
page 3-1
This is a plain demo child page.
Expand
The Expand shortcode displays an expandable/collapsible section of text on your page.
Usage
{{% expand [ <string> [ "true" | "false" ] ] %}}
Yes!
{{% /expand %}}
The first optional parameter defines the text that appears next to the expand/collapse icon. The default text is "Expand me...".
The second optional parameter controls if the block is initially shown as expanded ("true") or collapsed ("false"). The default ist "false".
Examples
All defaults
Initially expanded
Arbitrary text
Include
The include shortcode includes other files from your project inside of the current file. This can even contain Markdown and will be taken into account when generating the table of contents.
Usage
{{% include <string> [ "true" | "false" ] %}}
The first required parameter is the path to the file to be included.
If the file’s content will be displayed as HTML, the second optional parameter controls if the first heading of the included file should be displayed ("true")- which is the default - or be hidden.
Examples
Arbitray content
Mermaid
Mermaid is a library helping you to generate diagram and flowcharts from text, in a similar manner as Markdown.
Note
This only works in modern browsers.
Warning
Due to limitations with Mermaid, it is currently not possible to use Mermaid code fences in an initially collapsed expand shortcode. This is a know issue and can’t be fixed by this theme.
Usage
Just insert your Mermaid code in the mermaid shortcode like this:
{{< mermaid [ align=("left"|"right"|"center"|"justify") ] >}}
classDiagram
    Person *-- Dog
{{< /mermaid >}}
You can set an optional align attribute which defaults to "center".
If you don’t need alignment you can use the alternative syntax using code fences if you have turned off guessSyntax for the markup.highlight setting (see below):
```mermaid
classDiagram
    Person *-- Dog
```
The generated graphs can be be panned by dragging them and zoomed by using the mousewheel. On mobile devices you can use finger gestures.
Examples
Flowchart
%%{init:{"theme":"forest"}}%%
graph LR;
A[Hard edge] -->|Link text| B(Round edge)
B --> C{Decision}
C -->|One| D[Result one]
C -->|Two| E[Result two]
Sequence
sequenceDiagram
participant Alice
participant Bob
Alice->>John: Hello John, how are you?
loop Healthcheck
John->John: Fight against hypochondria
end
Note right of John: Rational thoughts
prevail... John-->Alice: Great! John->Bob: How about you? Bob-->John: Jolly good!
prevail... John-->Alice: Great! John->Bob: How about you? Bob-->John: Jolly good!
GANTT
gantt
dateFormat YYYY-MM-DD
title Adding GANTT diagram functionality to Mermaid
section A section
Completed task :done, des1, 2014-01-06,2014-01-08
Active task :active, des2, 2014-01-09, 3d
Future task : des3, after des2, 5d
Future task2 : des4, after des3, 5d
section Critical tasks
Completed task in the critical line :crit, done, 2014-01-06,24h
Implement parser and jison :crit, done, after des1, 2d
Create tests for parser :crit, active, 3d
Future task in critical line :crit, 5d
Create tests for renderer :2d
Add to Mermaid :1d
Class
classDiagram
Class01 <|-- AveryLongClass : Cool
Class03 *-- Class04
Class05 o-- Class06
Class07 .. Class08
Class09 --> C2 : Where am i?
Class09 --* C3
Class09 --|> Class07
Class07 : equals()
Class07 : Object[] elementData
Class01 : size()
Class01 : int chimp
Class01 : int gorilla
Class08 <--> C2: Cool label
State
stateDiagram-v2
open: Open Door
closed: Closed Door
locked: Locked Door
open --> closed: Close
closed --> locked: Lock
locked --> closed: Unlock
closed --> open: Open
Configuration
Mermaid is configured with default settings. You can customize Mermaid’s default settings for all of your files thru a JSON object in your config.toml, override these settings per page thru your pages frontmatter or override these setting per diagramm thru diagram directives.
The JSON object of your config.toml / frontmatter is forwarded into Mermaid’s mermaid.initialize() function.
See Mermaid documentation for all allowed settings.
The theme setting can also be set by your used color variant. This will be the sitewide default and can - again - be overridden by your settings in config.toml, frontmatter or diagram directives.
Note
If you want to use mermaid codefences, you have to turn off guessSyntax for the markup.highlight setting.
Example
[params]
  mermaidInitialize = "{ \"theme\": \"dark\" }"

[markup]
  [markup.highlight]
    # if set to `guessSyntax = true`, there will be no unstyled code even if no language
    # was given BUT mermaid code fences will not work anymore! So this is a mandatory
    # setting for your site
    guessSyntax = false
or pages frontmatter
+++
mermaidInitialize = "{ \"theme\": \"dark\" }"
+++
Notice
The notice shortcode shows four types of disclaimers to help you structure your page.
Usage
{{% notice ( note | info | tip | warning ) [ <string> [ <string> ] ] %}}
Some markup
{{% /notice %}}
The first parameter is required and indicates the type of notice.
The second parameter is optional. If provided, it will be used as the title of the notice. If not provided, then the type of notice will be used as the title. For example, the title of a warning notice will be “Warning”.
The third parameter is optional. If provided, it will set the icon of near the title. For the standard types of notices, this is automatically determined but can be overridden with this parameter. If you want no icon at all, you have to set this parameter to " " (a non empty string filled with spaces).
Examples
Note
Note
A notice disclaimer
You can add:
- multiple paragraphs
- bullet point lists
- emphasized, bold and even bold emphasized text
- links
- other shortcodes besides
notice - etc.
...and even source code
the possiblities are endless
Info
Info
An information disclaimer
You can add:
- multiple paragraphs
- bullet point lists
- emphasized, bold and even bold emphasized text
- links
- other shortcodes besides
notice - etc.
...and even source code
the possiblities are endless
Tip
Tip
A tip disclaimer
You can add:
- multiple paragraphs
- bullet point lists
- emphasized, bold and even bold emphasized text
- links
- other shortcodes besides
notice - etc.
...and even source code
the possiblities are endless
Warning
Warning
A warning disclaimer
You can add:
- multiple paragraphs
- bullet point lists
- emphasized, bold and even bold emphasized text
- links
- other shortcodes besides
notice - etc.
...and even source code
the possiblities are endless
Notice with default color, custom title and icon
You can customize the title of the notice by passing it as a second parameter.
Pay Attention to this Note!
The title is now the parameter that was provided.
Site param
The siteparam shortcode is used to help you print values of site params.
Usage
{{% siteparam <string> %}}
The first required parameter is the name of the site param to be displayed.
Examples
For instance, in this current site, the editURL variable is used in config.toml
[params]
  editURL = "https://github.com/McShelby/hugo-theme-relearn/edit/main/exampleSite/content/"
Use the siteparam shortcode to display its value.
`editURL` Value : {{% siteparam "editURL" %}}
is displayed as
editURL Value : https://github.com/McShelby/hugo-theme-relearn/edit/main/exampleSite/content/
Swagger
This shortcode uses the RapiDoc library to display your OpenAPI Specifications.
Note
This only works in modern browsers.
Configuration
Swagger is configured with default settings. You can customize Swagger’s default settings for all of your files thru a JSON object in your config.toml or override these settings per page thru your pages frontmatter.
The JSON object of your config.toml / frontmatter is forwarded into Swagger’s initialization. At the moment, only the theme setting is supported.
The theme setting can also be set by your used color variant. This will be the sitewide default and can - again - be overridden by your settings in config.toml or frontmatter.
Example
[params]
  swaggerInitialize = "{ \"theme\": \"dark\" }"
Usage
Just insert give the URL to your OpenAPI Specification like this:
{{< swagger src="https://petstore3.swagger.io/api/v3/openapi.json" >}}
If your page is a leaf or branch bundle, you can also use relative URLs:
{{< swagger src="petstore.json" >}}
The src parameter is mandatory and can be either an absolute or a relative URL.
Example
Tabbed views
Choose which content to see across the page. Very handy for providing code snippets for multiple languages or providing configuration in different formats.
Code example
{{< tabs >}}
{{% tab name="python" %}}
```python
print("Hello World!")
```
{{% /tab %}}
{{% tab name="R" %}}
```R
> print("Hello World!")
```
{{% /tab %}}
{{% tab name="Bash" %}}
```Bash
echo "Hello World!"
```
{{% /tab %}}
{{< /tabs >}}
Renders as:
print("Hello World!")
> print("Hello World!")
echo "Hello World!"
Tab views with the same tabs that belong to the same group sychronize their selection:
print("Hello World!")
> print("Hello World!")
echo "Hello World!"
Config example
{{< tabs groupId="config" >}}
{{% tab name="json" %}}
```json
{
  "Hello": "World"
}
```
{{% /tab %}}
{{% tab name="XML" %}}
```xml
<Hello>World</Hello>
```
{{% /tab %}}
{{% tab name="properties" %}}
```properties
Hello = World
```
{{% /tab %}}
{{< /tabs >}}
Renders as:
{
  "Hello": "World"
}
<Hello>World</Hello>
Hello = World
Warning
When using tab views with different content sets, make sure to use a common groupId for equal sets but distinct
groupId for different sets. The groupId defaults to 'default'.
Take this into account across the whole site!
The tab selection is restored automatically based on the groupId and if it cannot find a tab item because it came
from the 'default' group on a different page then all tabs will be empty at first.